➕ Add a New Rule
Create your first Auto-Schedule Rule by following these steps.
Getting Started
-
Type
/configin the bot -
Select ⚡ Auto-Schedule Rules
-
Tap ➕ Add Scheduling Rule
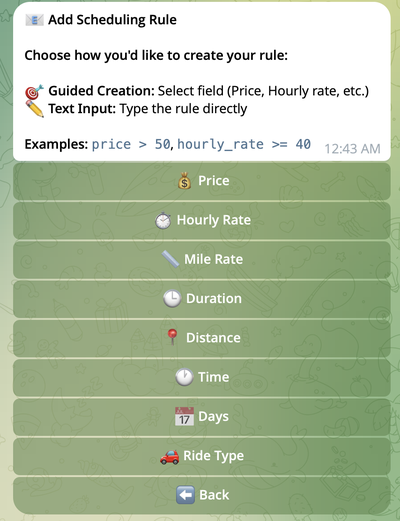
Step 1: Choose a Field
Select which ride attribute to filter:
| Field | What It Filters |
|---|---|
| 💰 Price | Ride payout |
| ⏱️ Hourly Rate | Earnings per hour |
| 📏 Mile Rate | Earnings per mile |
| 🕒 Duration | Ride length (minutes) |
| 📍 Miles | Total distance |
| ⏰ Time | Time of day |
| 📅 Days | Day of week |
| 🚗 Ride Type | Ride category |
Step 2: Choose an Operator
For numeric fields (Price, Hourly Rate, Mile Rate, Duration, Miles):
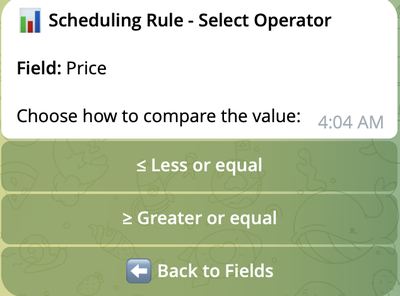
- >= – At least this value (most common)
- <= – At most this value
Time, Days, and Ride Type fields skip this step and present a list of options to select from.
Step 3: Enter a Value
Numeric Fields
Choose a preset value or enter your own:
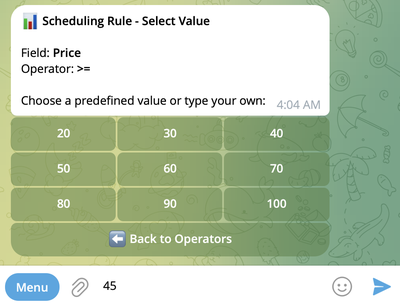
Examples:
- Price:
30,45.50 - Hourly Rate:
40,55.25 - Mile Rate:
1,1.3 - Duration:
15,30,60 - Miles:
5,10.5,20
Time Field
Option 1: Preset slots (2-hour intervals)
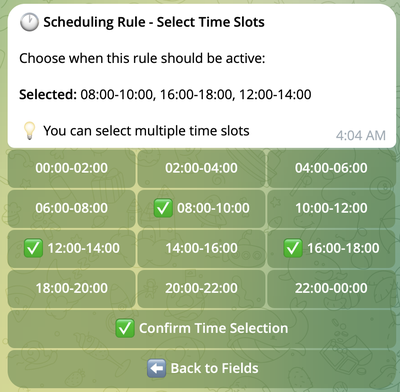
- Tap hours to toggle (✅ = selected)
- Tap ✅ Confirm Time Selection when done
Option 2: Custom intervals
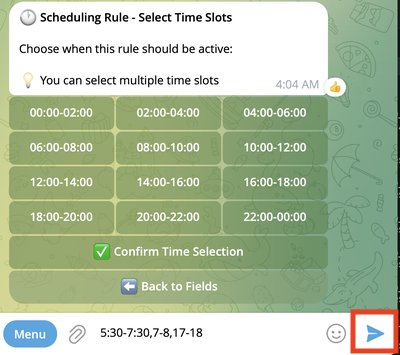
- Enter time ranges manually (e.g.,
07:00-09:00, 17:00-19:00) - Hit Send
Days Field
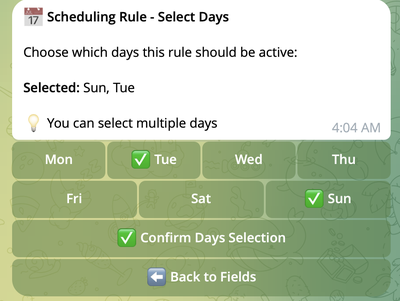
- Tap days to toggle (✅ = selected)
- Tap ✅ Confirm Days Selection when done
Ride Type Field
All ride types are selected by default. Uncheck any you want to exclude.
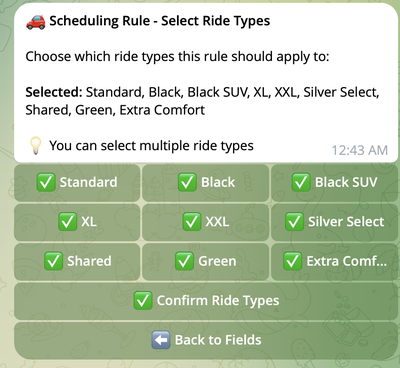
- Tap ride types to toggle (✅ = selected)
- Tap ✅ Confirm Ride Type Selection when done
Step 4: Add More Conditions (Optional)
After adding your first condition:
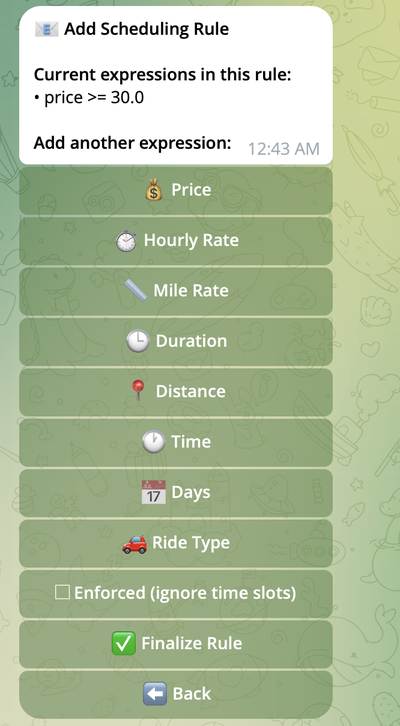
Options:
- ➕ Add Another Criterion – Add more conditions (repeat Steps 1-3)
- ✅ Finalize Rule – Save and activate
All conditions in a single rule must match for the ride to be booked.
Example: Price >= 30 AND Duration <= 20
- Ride must be ≥$30 AND ≤20 minutes
- If either condition fails, ride is skipped
Step 5: Enable Enforcement (Optional)
After adding a numeric field, you may see an Enforced checkbox:
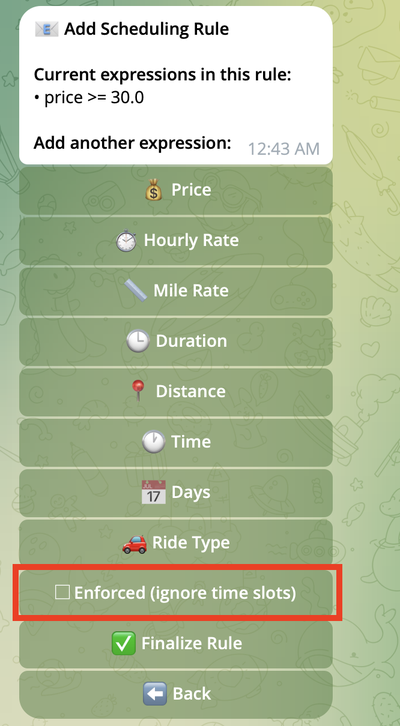
| Setting | Behavior |
|---|---|
| ☐ Unchecked (default) | Rule applies only during scheduled hours |
| ✅ Checked (enforced) | Rule applies 24/7, ignoring your schedule* |
*Unless you add Time or Days conditions to limit it
Example:
- Schedule: Mon-Fri, 9 AM - 5 PM
- Enforced rule:
Price >= 100 - Result: $120 ride at 2 AM Saturday gets booked
Enforced rules override your schedule. Use carefully for exceptional rides only.
Step 6: Save Your Rule
Tap ✅ Finalize Rule to activate.
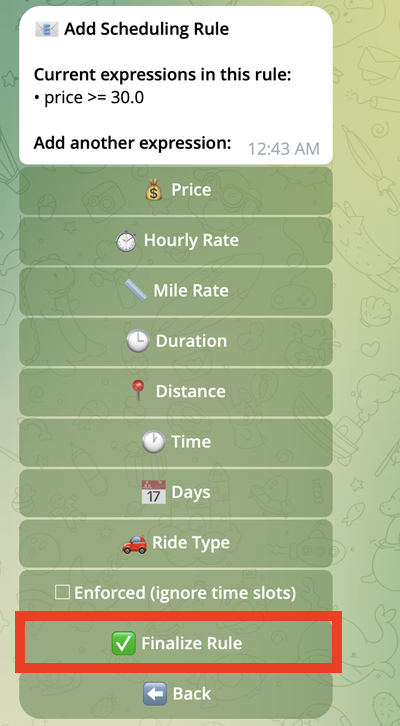
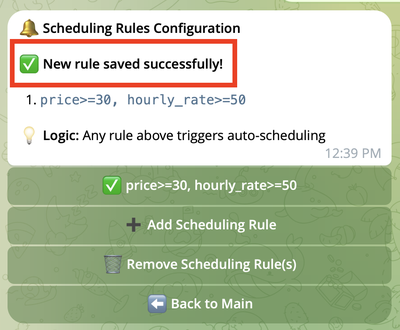
✅ Your rule is now active!
Quick Reference
Creating a rule:
- Choose field → 2. Choose operator → 3. Enter value → 4. (Optional) Add more conditions → 5. (Optional) Enable enforcement → 6. Save
Multiple conditions in ONE rule: ALL must match (AND)
Multiple rules: ANY can match (OR)